Learn Candle Making
Candle Tunneling
A shaft down the middle and a wall of wasted wax. Two causes, one recovery, one real fix.
We have not burned these candles and we do not claim to have. Here is what we did instead. Links to Amazon earn us a commission at no extra cost to you — disclosure.

| # | Product | Best for | Price |
|---|---|---|---|
| 1 | 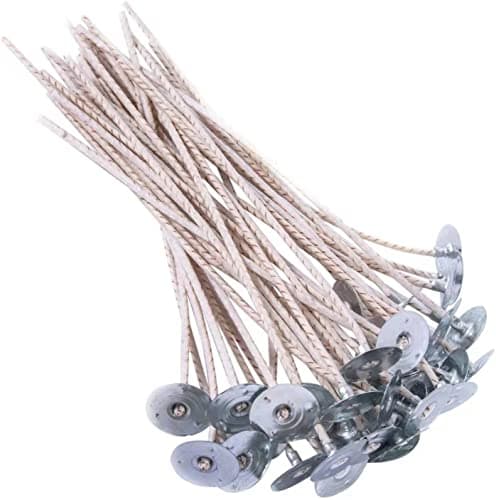 ECO 10 Pre-Waxed Wicks for Soy Candles, 100 pcsTop pickECO is the series whose charts are published for soy directly rather than adjusted from paraffin, which makes it the easiest series for a beginner to size correctly on the first try. | 3 to 3.25 inch soy containers, on the US charts | |
| 2 | 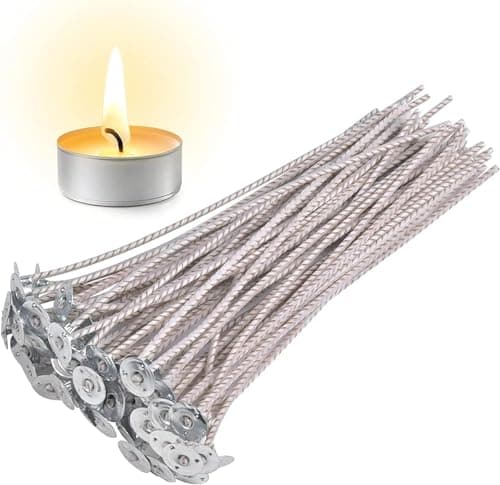 CD 12 Pre-Tabbed Candle Wicks for Soy Candles, 100 pcsCD 12 is the size the published soy charts point to for a standard 3-inch jar, which is the jar most beginner kits ship. Buying the series by size rather than by assortment is how you actually control a burn. | Jars around 2.5 to 3 inches across | |
| 3 | 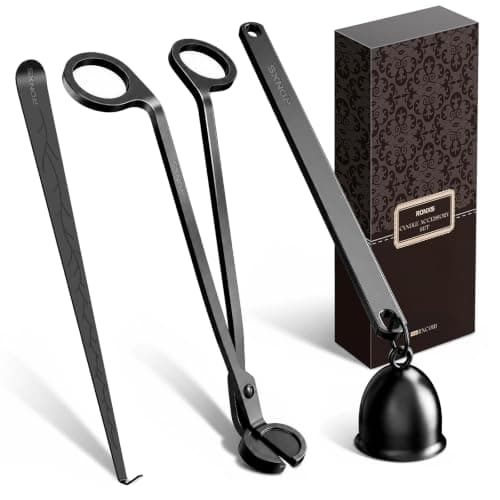 RONXS 3-in-1 Candle Wick Trimmer, Snuffer and Dipper SetTrimming the wick to a quarter inch before every burn is the single maintenance step that changes how a candle performs, and the angled blade on a proper trimmer reaches into a jar that scissors cannot. | The quarter-inch rule, without nail scissors |
Tunneling is the most common complaint about a homemade candle and the most visible: a narrow shaft burns down the middle while a thick wall of wax stays untouched around the edge. Sometimes half the candle is wasted.
What is actually happening
A flame projects heat outward for a limited distance. If that distance is shorter than the radius of the container, the wax at the edge never reaches its melt point and never joins the pool. The flame burns straight down instead of outward.
Two things produce that situation, and they are worth telling apart because the fixes differ.
Cause 1: the wick is too small
The straightforward case. The wick cannot deliver enough wax to sustain a flame large enough to melt across the full radius. It will tunnel on the first burn and every burn after.
How to tell: it tunnels from the very first burn, and a full four hours does not get the pool to the glass. Fix: a larger wick on the next pour, sized from the chart for your diameter and wax family.
Cause 2: the first burn was cut short
Wax has a memory. The first burn establishes the diameter the pool will reach on every subsequent burn, and a candle blown out after an hour has recorded a small pool. Even a correctly wicked candle will follow that ring afterward.
How to tell: the first burn was short, and the tunnel diameter matches roughly where the pool got to that first time. Fix: the foil method below, and a full four-hour first burn next time.
Recovering a tunneled candle: the foil method
- Trim the wick to a quarter inch first. A long wick will make this worse.
- Wrap aluminum foil around the top of the jar, forming a collar that extends an inch or two above the rim.
- Fold the foil inward over the top, leaving a hole of about an inch above the flame.
- Light the candle and let it burn two to three hours. The foil reflects heat down onto the unmelted rim.
- Watch it. Foil gets hot and this is a modification to a burning candle, so it is not a set-and-forget procedure.
- When the surface has leveled, remove the foil, let it set, and burn normally for four hours next time.
It works, and it works once or twice. It does not fix an undersized wick, which will simply tunnel again from the new level.
The other recovery: melt and repour
If the tunnel is deep and the wick is genuinely wrong, the honest option is to recover the wax and the jar and start again. Stand the jar in hot water until the wax softens, pour it out, clean the glass, and repour with the right wick.
You lose nothing but the wick. Wax is cheap, jars are not disposable, and a candle that will waste a third of its wax is worth thirty minutes.
Top pick · 3 to 3.25 inch soy containers, on the US charts
ECO 10 Pre-Waxed Wicks for Soy Candles, 100 pcs
ECO series
ECO is the series whose charts are published for soy directly rather than adjusted from paraffin, which makes it the easiest series for a beginner to size correctly on the first try.
#ad · how this is funded · price as of October 17, 2026
Published specifications
- Series
- ECO, flat coreless cotton with paper filamentsSource: Amazon product listing, read 2026-09-02
- Quantity
- 100 piecesSource: Amazon product listing, read 2026-09-02
- Length
- 6 inches, pre-waxed with tabSource: Amazon product listing, read 2026-09-02
- Published range (soy)
- 3.0 to 3.25 inch containersSource: Lone Star Candle Supply ECO soy chart
- Alternative published range
- up to 2.76 inchesSource: Wedo metric ECO chart
What that means
The two published ranges above disagree by nearly half an inch for the same wick, and both are printed by people who sell it. That is not an error on anyone's part; the US charts are soy-adjusted and the Wedo chart covers soy and paraffin together.
Practically: if you are in a 3-inch soy jar and you use the US charts, ECO 10 is the starting wick. If you use Wedo's, you want ECO 14 in the same jar. Test both.
The paper filaments in an ECO wick make it curl and self-trim, in the same way CD does. Both are coreless, so there is no metal or zinc in the flame.
Good
- Charts published for soy directly, not adjusted from paraffin
- Coreless and self-trimming
- The series most commonly stocked with soy kits
Less good
- Published guidance varies by up to two sizes between suppliers
- Needs a size up again in beeswax
Skip this one if
You are burning paraffin. The LX and zinc charts are the ones written for it, and an ECO sized for soy will be too large.
Pick 2 · Jars around 2.5 to 3 inches across
CD 12 Pre-Tabbed Candle Wicks for Soy Candles, 100 pcs
CD series
CD 12 is the size the published soy charts point to for a standard 3-inch jar, which is the jar most beginner kits ship. Buying the series by size rather than by assortment is how you actually control a burn.
#ad · how this is funded · price as of October 17, 2026
Published specifications
- Series
- CD, cotton and paper flat braidSource: Amazon product listing, read 2026-09-02
- Quantity
- 100 piecesSource: Amazon product listing, read 2026-09-02
- Length
- 6 inches, pre-tabbedSource: Amazon product listing, read 2026-09-02
- Published range (soy)
- 2.5 to 3 inch containersSource: Tools for Makers CD soy chart
What that means
CD wicks curl as they burn, which trims the tip and reduces the mushroom of carbon that builds on a straight wick. That self-trimming behavior is the whole reason the series exists.
The published charts disagree on CD for soy by up to two sizes, because Lone Star prints CD against base paraffin and tells you to size up one to three for soy. Our chart shows both readings side by side.
Good
- One size, 100 of them, so you can run a proper burn test
- Self-trimming curl reduces mushrooming
- Pre-tabbed, so no assembly
Less good
- Wrong size for a 4-inch jar and wrong size for a votive
- CD in beeswax needs a different size again
Skip this one if
You do not yet know your container diameter. Measure the inside of the jar first, then buy the size the chart gives you.
Pick 3 · The quarter-inch rule, without nail scissors
RONXS 3-in-1 Candle Wick Trimmer, Snuffer and Dipper Set
RONXS
Trimming the wick to a quarter inch before every burn is the single maintenance step that changes how a candle performs, and the angled blade on a proper trimmer reaches into a jar that scissors cannot.
$12.99 · 10% off
#ad · how this is funded · price as of October 17, 2026
Published specifications
- Contents
- Wick trimmer, snuffer, wick dipperSource: Amazon product listing, read 2026-09-02
- Material
- Stainless steelSource: Amazon product listing, read 2026-09-02
- Why a quarter inch
- Published GW 464 instructions specify trimming the wick to 1/4 inch and caution against trimming shorterSource: Cal Candle Supply published GW 464 instructions
What that means
The trimmer's angled plate catches the cut piece instead of dropping it into the wax, which is the actual functional difference from scissors.
The dipper is for putting the flame out by pushing the wick into the melt pool. It stops the smoke trail a snuffer leaves, and it re-coats the wick in wax for the next light.
Good
- Reaches into deep jars where scissors cannot
- Catches the trimmings
- The dipper removes the post-extinguish smoke entirely
Less good
- Not needed at all until you have candles to burn
- Three tools where most people only ever use one
Skip this one if
You have not poured a candle yet. Buy wax, wicks and a jar first. This is maintenance for candles that already exist.
Preventing it
| Action | Why |
|---|---|
| Size the wick from a published chart for your wax | Removes cause 1 entirely |
| Burn the first session a full 4 hours | Removes cause 2 entirely |
| Trim to 1/4 inch before every burn | A long wick gives a tall flame, not a wide pool |
| Keep it out of drafts | A leaning flame melts one side and sets an uneven ring |
| Burn-test two wick sizes before a batch | Finds the problem on two candles, not twelve |
How much wax tunneling wastes
When it is not tunneling
- A thin ring left after four hours is normal on a first burn and usually clears on the second. Give it one more session before diagnosing.
- Burning down one side is an off-center wick or a draft, not tunneling.
- A hole around the wick after pouring is contraction, not tunneling. Top it up with a small second pour.
How these picks were made. Published specifications compiled from the sources listed below, the arithmetic shown on the page, and live Amazon prices. No product here has been burned by us. Read the method.
Common questions
Why is my candle tunneling?
Either the wick is too small for the container diameter, or the first burn was cut short and set a memory ring the candle now follows. The first tunnels from the very first burn; the second follows the ring the short burn established.
How do you fix a tunneled candle?
Wrap foil around the top of the jar with a hole above the flame, and burn for two to three hours so the reflected heat levels the surface. Watch it throughout. It works once or twice and does not fix an undersized wick.
How long should you burn a candle the first time?
A full four hours, or at least until the melt pool reaches the container wall. Wax has a memory and the first burn sets the pool diameter for every burn afterward.
Can you prevent candle tunneling?
Yes, with two things: a wick sized from a published chart for your container diameter and wax, and a full four-hour first burn.
How much wax does tunneling waste?
More than it looks. A 2-inch tunnel in a 3-inch jar leaves 56 percent of the wax unburned, because the wasted area scales with the square of the radius.
Sources
- Cal Candle Supply - Golden Wax 464 published instructions (heat, fragrance and pour temperatures)
- Lone Star Candle Supply - Guide to Wicking (ECO, CD, HTP, LX, zinc and wooden wick charts)
- National Fire Protection Association - Candle safety guidance
- U.S. Consumer Product Safety Commission - candle fire safety
Read next
Learn Candle Making
Step-by-step candle making guides, the fixes for the common failures, and comparisons with wax melts and warmers.
Is My Wick Too Big or Too Small?
A symptom-by-symptom diagnostic: what soot, a tall flame, a hot container or a tunneling ring each tell you about wick size.

Candle Wick Size Chart
ECO, CD, HTP, LX, zinc and wooden wick sizes from four published charts, cross-referenced by container diameter with every publisher named.
Wick Burn Testing
The full burn test procedure: setup, what to record hour by hour, what a correct melt pool looks like, and how to read each failure.
How to Make Candles
The complete candle making walkthrough: equipment, wax and fragrance arithmetic, published temperatures, the pour, the cure and the fixes.
Candle Safety and Labeling
Candle fire safety guidance and the US labeling standards that apply to candles you sell, with the warnings a label must carry.